- Apr 26, 2004
- 1,430
- 0

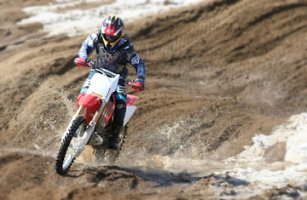
Here is what I did:
- Cropped
- Reduced overall brightness and added overall contrast
- Sharpened overall a tiny bit
- Added border
What I would like to do:
- Reduce exposure on my right arm and helmet
- Get some more brightness on my left body side (especially on leg)
- Add some blur to the background in order to focus on the rider
I'd like some tips on how to do what I would like to do. I've searched for a tutorial for exposure, but can't find anything helpful. How do I add some blur to some areas? Anything else I should do to make it better?
My goal is to get better with Photoshop; I doubt I will ever print this photo. Also, the quality seem to drop when I resized the picture. Any tips?
Thanks for any input!
Last edited: