Help!...Float setting height for an '02' CR 250...

vetcr47

Member
Oct 20, 2004
22
0
:bang: My CR is staring for fuel at very hi rpm's (surging) ....I think it is the float setting. My jetting is pretty crisp, but not too lean. My '01' CR float height was 15 mm but that was a different carb. Can anyone help me with the setting for the '02' carb? This motor has entensive carb/port/ign, etc...mods..

thank you....
 

vetcr47

Member
Oct 20, 2004
22
0
02 model year info. requested...

The '02' is a Mikuni.......you are correct that the '01' was a different carb (Kehein) spelling is off...sorry

do you know what the '02' setting is in millimeters?
 

pro2k

Member
Nov 7, 2002
316
0
My service manual indicates that the float level should be 15mm for both the 02 and 03. It also says to look at the following items:

Fuel jsts clogged
Fuel tank breather hose clogged
Fuel filter clogged
Fuel line restricted
Float valve faulty
Float level too low
Air vent hose clogged
Advanced ignition timing
Intake air leak
Worn crankshaft seal (alternator side)
Jetting incorrect

Hope this might help! :yeehaw:
 

Faded

~SPONSOR~
Jan 7, 2003
842
0
2001's were the first year of the Mikunis, float height is 15mm and is the same for the 02-04 CR250s. The '00 and earlier bikes used different variations of the Keihin, float height was 16mm on these.
 

soulmate33

LIFETIME SPONSOR
Sep 29, 2004
158
0
Aloha everyone,

Hey vetcr47, I'm gonna piggy back this question on to your thread instead of starting a new one.

I also own a 2002 CR250 and would like to know what is the PROPER way to measure the float level?

Does the spring loaded pin behind the needle have to be completely compressed prior to measuring the 15mm?
or
Do you measure the 15mm when the needle stops moving when reaching the seat (spring loaded pin not fully compressed yet).

None of the manuals I've read explain this adjustment in detail.

Thanks for your time.

Tracy
 

Faded

~SPONSOR~
Jan 7, 2003
842
0
You’ll need to first start off by removing your carb. Be sure to clean the surrounding area to the best of your ability to avoid dirt and debris falling into your carb, or worse, your engine. After you’ve removed your carb I would suggest a thorough cleaning using carb cleaner (or equivalent) and compressed air to ensure that all jets and passageways are spotless. Avoid using wire or other tools to clean orifices of jets; it’s all too easy to alter their original designed dimensions.

After your carb is clean you can now set your float level. The picture below will allow you to become familiar with the parts that are responsible for maintaining the correct float level in your carb. There are four basic parts, the floats themselves (part of the float assembly), the float assembly tang, the fuel inlet needle valve, and the fuel inlet valve seat.


Float Level Pic #1
(Float assembly pivot pin not shown.)


It is always a good idea to remove the float assembly pivot pin (already shown removed) and extract the float assembly and the fuel inlet needle. The fuel inlet needle is a wearable part and over time can deteriorate. A worn fuel inlet needle can contribute to an irregular float level. Most fuel inlet needles consist of an internal spring loaded bumper (which contacts the float assembly tang) and a plastic or Viton (rubber) tip. Inspect the fuel inlet needle tip for wear and/or damage. To give you an idea, Eric Gorr recommends replacing the fuel inlet needle/seat assembly every two years. I’ve found that the average cost it around $15 for both parts.


Float Level Pic #2
(Fuel inlet needle shown with Viton (rubber) tip. The Viton is used to isolate the fuel inlet needle from vibration and to create a better seal against the fuel inlet valve seat.)


Now that you’ve made sure you aren’t going to have any issues from worn parts you can reinstall your needle, float assembly and float assembly pivot pin and continue on to set your float level. The float level measurement is taken from the top of the floats (when the carb is positioned upside down) to the gasket surface of the float bowl as illustrated in the next picture. You can use an open-end wrench (sized per your spec), a small metric ruler, or a float level gauge. The tolerance for your float level is usually around +/- 0.50mm.


Float Level Pic #3


When setting the float level be aware that the spring loaded bumper on the fuel inlet needle valve may have a tendency to compress under the weight of the float assembly which will skew your measurement. Before you obtain your measurement you’ll need to make sure that the float assembly tang just barely makes contact with the spring-loaded bumper. Sometimes it is easier to hold the carb body at a 45-degree angle to avoid compressing the spring in the fuel inlet needle.


Float Level Pic #4


If you find that your measurement does not match your float level spec then you can carefully bend the float assembly tang to achieve your desired measurement. Be sure to recheck your work, and if you feel confident that your float level is spot on then you can reinstall your carb and get back to riding.
 
Last edited:

Faded

~SPONSOR~
Jan 7, 2003
842
0
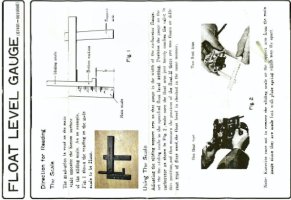
For around $25 you can get one of these from your Honda dealer if you so desire. (The attachment rules made me upload it sideways, sorry).
 

Attachments

  • FLOATLEVELGAUGE.jpg
    FLOATLEVELGAUGE.jpg
    64.9 KB · Views: 673

vetcr47

Member
Oct 20, 2004
22
0
That 'Faded' guy is a genius!!!!!! What jetting specs. did you finally end-up with?

I have never had such a surgical answer to a question before......

Next time I'll include my Amex number.......thanks!
 

Faded

~SPONSOR~
Jan 7, 2003
842
0
vetcr47 said:
What jetting specs. did you finally end-up with?

2002 CR265
2mm overbore w/68.50mm Wiseco
E Gorr Mo Betta porting
4700ft, Premix @ 32:1

I'm having a little trouble dialing in 1/4 throttle, so these aren't perfect. I'm currently going through the bike and eliminating all possibilities, but these are close.

Mikuni:
Float Level - 15mm
Pilot - #30
Air Screw - 1.25 Turns Out
Stock Slide
6BEY30-73 Needle, 2nd clip
S-8 Needle Jet (Nozzle)
350 Main

Keihin (still working on this, only 2 rides since the switch):
Float Level - 16mm
Pilot - #42
Air Screw - 2 Turns Out
Slide - #6
1368NS Needle, 2nd Clip
168 Main
 

pro2k

Member
Nov 7, 2002
316
0
How much difference did that overbore make? I would like some more low end power and torque but want to keep the linear power (smooth power delivery) that my 03 has now. Does your bike have a hard hit? Would you do it again?
 

Faded

~SPONSOR~
Jan 7, 2003
842
0
Big Bore

The overbore amplified the stock power curve. Power delivery is very linear and smooth like the stocker and void of any abrupt transitions. Low end power is improved but not what I'd call abundant. From bottom to top this thing is like Dr. Jekyll turning into Mr. Hyde, usable power down low that smoothly transitions into a raging mad top end. The further you twist the throttle the more you piss off the motor. The top end is just scary but comes in handy when trying to clear larger obstacles. I would do it again, but I would gladly trade a little peak power for some more meat down low to help balance out the bike a little better. It should also be noted that my skills fall short when trying to hang on in the upper rpm range.
 

Wilky

Member
Oct 21, 2004
51
0
04 Float level

I just read my manual and the 04 CR250 float level should be 7.5mm not the 15mm stated in this tread Just a FYI
 
Top Bottom